-
[RESTFUL 학습] JPA를 사용하기 위한 기본 세팅(H2 DB 사용)SPRING/WEBSERVICE 2020. 9. 5. 20:03
<dependency>
	<groupId>org.springframework.boot</groupId>
	<artifactId>spring-boot-starter-data-jpa</artifactId>
</dependency>
<dependency>
	<groupId>com.h2database</groupId>
	<artifactId>h2</artifactId>
	<scope>runtime</scope>
</dependency>
JPA와 H2 DB를 사용하기 위해서는 위와 같이 pom.xml에 dependency를 추가합니다.
만약 spring security를 사용한다면 아래와 같이 security 설정 파일에서 메서드를 재정의해야 한다.
// h2-console를 인증처리 없이 사용할 수 있도록 재정의
// security 관련 설정을 하였다면, Security 설정 클래스에서 아래와 같이 메서드롤 재정의해야
// h2-console를 사용할 때 security 인증 처리 없이 사용할 수 있다.
    @Override
    protected void configure(HttpSecurity http) throws Exception {
        http.authorizeRequests().antMatchers("/h2-console/**").permitAll();
        http.csrf().disable();
        http.headers().frameOptions().disable();
    }
applicaiton.yml 파일에서 아래와 같이 설정하면 hibernate sql 로그를 console에 출력해준다.
spring :
 jpa:
  properties:
   hibernate:
     show_sql: true
또한 기존에 선언하였던 USER 클래스에 @Entity를 선언하면, WAS 서버를 구동할 때 쿼리가 실행이된다.
@Data
@AllArgsConstructor
// <!-- 아래와 같이도 표현가능 -->
//@JsonIgnoreProperties(value={"password"})
@NoArgsConstructor
// @JsonFilter("UserInfo")
@ApiModel(description = "사용자 상세 정보를 위한 도메인 객체")
@Entity
public class User {

    @Id
    @GeneratedValue
    private Integer id;
    @Size(min=2, message ="Name은 2글자 이상 입력해 주세요.")
    @ApiModelProperty(notes ="사용자의 이름을 입력해주세요.")
    private String name;
    @Past
    @ApiModelProperty(notes ="사용자의 등록일을 입력해주세요.")
    private Date joinDate;

    //@JsonIgnore

    @ApiModelProperty(notes ="사용자의 패스워드를 입력해주세요.")
    private String password;
    // @JsonIgnore

    @ApiModelProperty(notes ="사용자의 주민번호를 입력해주세요.")
    private String ssn;
}
쿼리 구동 위와 같이 설정을 하고 /h2-console url로 접속을 하면 아래와 같은 화면을 볼 수 있다.
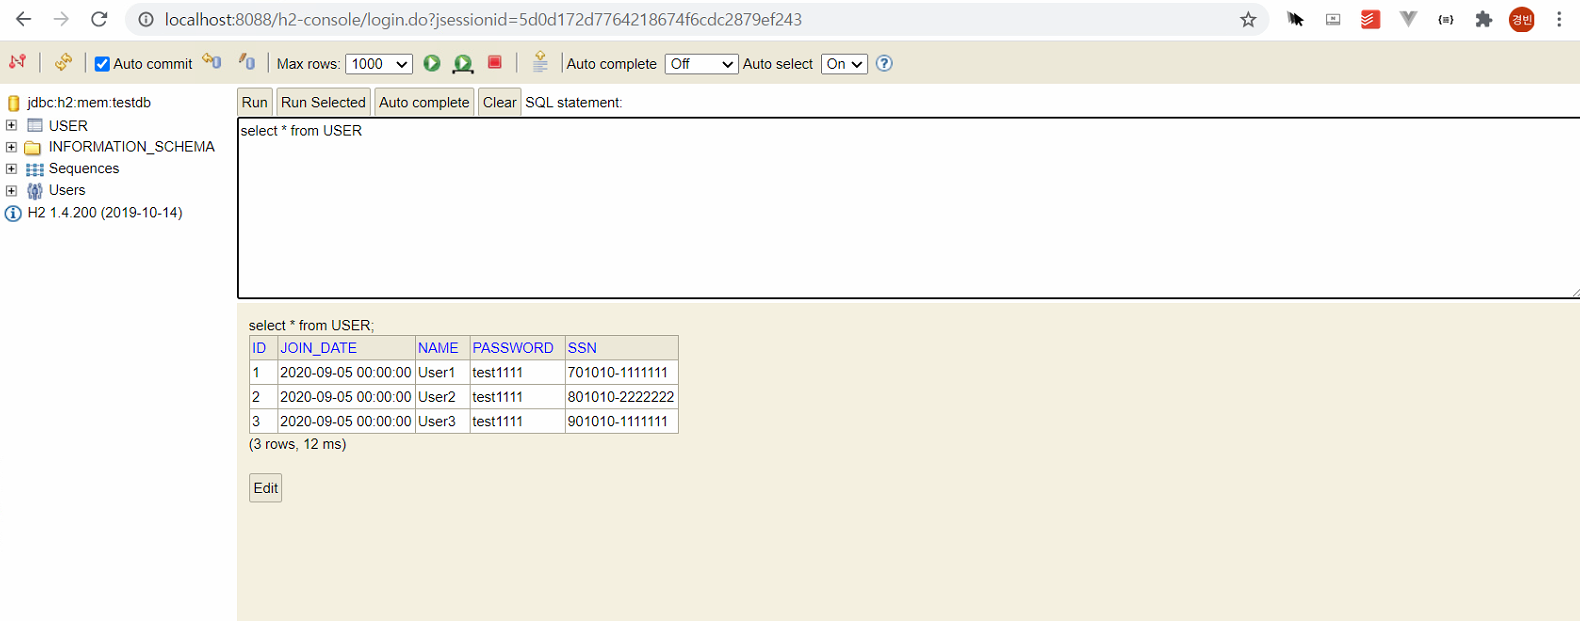
또한 아래와 같이 JDBC 설정을 하고 Connect를 하면 그 아래 스크린샷과 같이 웹으로 된 DB TOOL화면이 나온다.

아래 스크린샷과 같이 resources-> data.sql 파일에 쿼리를 입력하면 위와 같이 서버 구동시 H2 DB에 Insert 문이 실행이 된 것을 볼 수 있다.

'SPRING > WEBSERVICE' 카테고리의 다른 글
[RESTFUL 학습] JPA를 이용한 CRUD 심화(유저 -게시물 연동) (1) 2020.10.04 [RESTFUL 학습] JPA를 이용한 CRUD 기본 예제 (RESTCONTROLLER) (0) 2020.09.06 [RESTFUL 학습] spring-security 기본 (0) 2020.08.31 [RESTFUL] HAL BROWSER (0) 2020.08.31 [RESTFUL 학습] SWAGGER 심화-1 (0) 2020.08.31